

CloudLinux Installer
The CloudLinux Installer page (Applications → CloudLinux) is a guided installer that converts your server to CloudLinux. It walks you through activation, validates your environment, converts the operating system with a live log, and tracks the conversion through to completion.
This page is the per-view reference. For the full end-to-end workflow, including feature provisioning, the LVE Manager, and per-plan resource limits, see Integrations > CloudLinux.
Overview
URL: /admin/cloudlinux-installer
Open the installer from the left menu at Applications → CloudLinux, or from the CloudLinux card in Applications → Modules. Converting a server to CloudLinux is a node-level, admin-only action, and it requires a reboot to take effect.
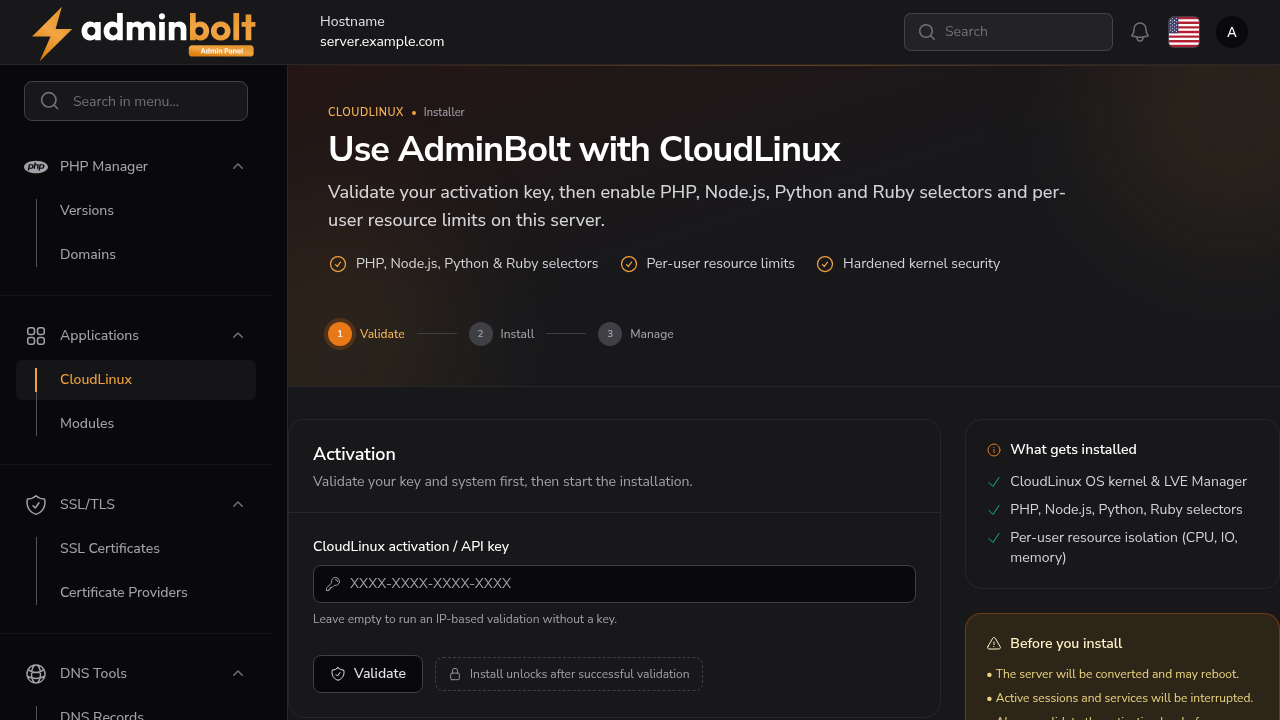
What the installer does
- License - Enter your CloudLinux activation (API) key and validate it, or leave the key empty to use an IP-based licence. A pre-check confirms the licence and that the system can be converted.
- Conversion - Start the conversion. The panel converts the operating system in the background and streams a live deploy log.
- Reboot - When the conversion finishes, the server needs to reboot onto the CloudLinux kernel. Use the Reboot now action to restart it.
Activation key or IP-based licence
Added in AdminBolt 1.7.0. An empty activation key is a valid choice, not a missing field: it selects an IP-based licence, where CloudLinux authorizes the server by its IP address instead of a key.
Validation reports which of the two it confirmed, and the panel remembers which mode a server was licensed in, so you can tell an IP-licensed server from a key-licensed one later.
Use an IP-based licence when your CloudLinux subscription is tied to the server's address. If the server's IP changes, the licence has to be re-issued for the new address on the CloudLinux side.
Precheck results
Added in AdminBolt 1.7.0. When the pre-check fails, the page names the individual checks that failed and any warnings reported alongside them, rather than reporting a single failure. An installation starts only on a clean pre-check.
Progress while it runs
A running job shows how long it has been going, and states that every step is time-bounded, so a slow conversion is distinguishable from a stuck one. Clicking again during a run reattaches to the running job instead of starting a second one.
A PHP version being installed or removed carries an Installing... badge with the elapsed time, instead of looking untouched.
The Services page lists the CageFS daemons on CloudLinux servers, so one that gets stuck can be restarted from the panel.
The installer reports the conversion state as it progresses:
| State | Meaning |
|---|---|
| converting | The OS conversion is running, with a live log. |
| installed-pending-reboot | CloudLinux is installed; the server must reboot onto the CloudLinux kernel. |
| converted | The server is running CloudLinux. |
Warning: Converting to CloudLinux rewrites the operating system and is effectively irreversible. It interrupts active sessions and services and requires a reboot. Take a provider snapshot before you start.
After conversion
Once the server is converted, CloudLinux features become available in the panel:
- LVE Manager - the native CloudLinux UI, embedded with single sign-on, for per-account resource usage and the language selectors.
- Per-plan Resource Limits - a Resource Limits tab on hosting plans (CPU, memory, I/O, IOPS, processes) that pushes LVE limits to every account on the plan.
- BoltTerminal - the terminal module (listed as Terminal on the Modules page) for isolated per-account SSH access on CloudLinux.
Related pages
- Integrations > CloudLinux - the full setup workflow.
- LVE Manager - manage per-account resource limits after conversion.
- Hosting Plans - set per-account resource limits through plans.