

Accounts
The Hosting Accounts section allows administrators to create, manage, and monitor individual hosting accounts under a specific hosting plan.
Overview
URL: /admin/hosting-accounts
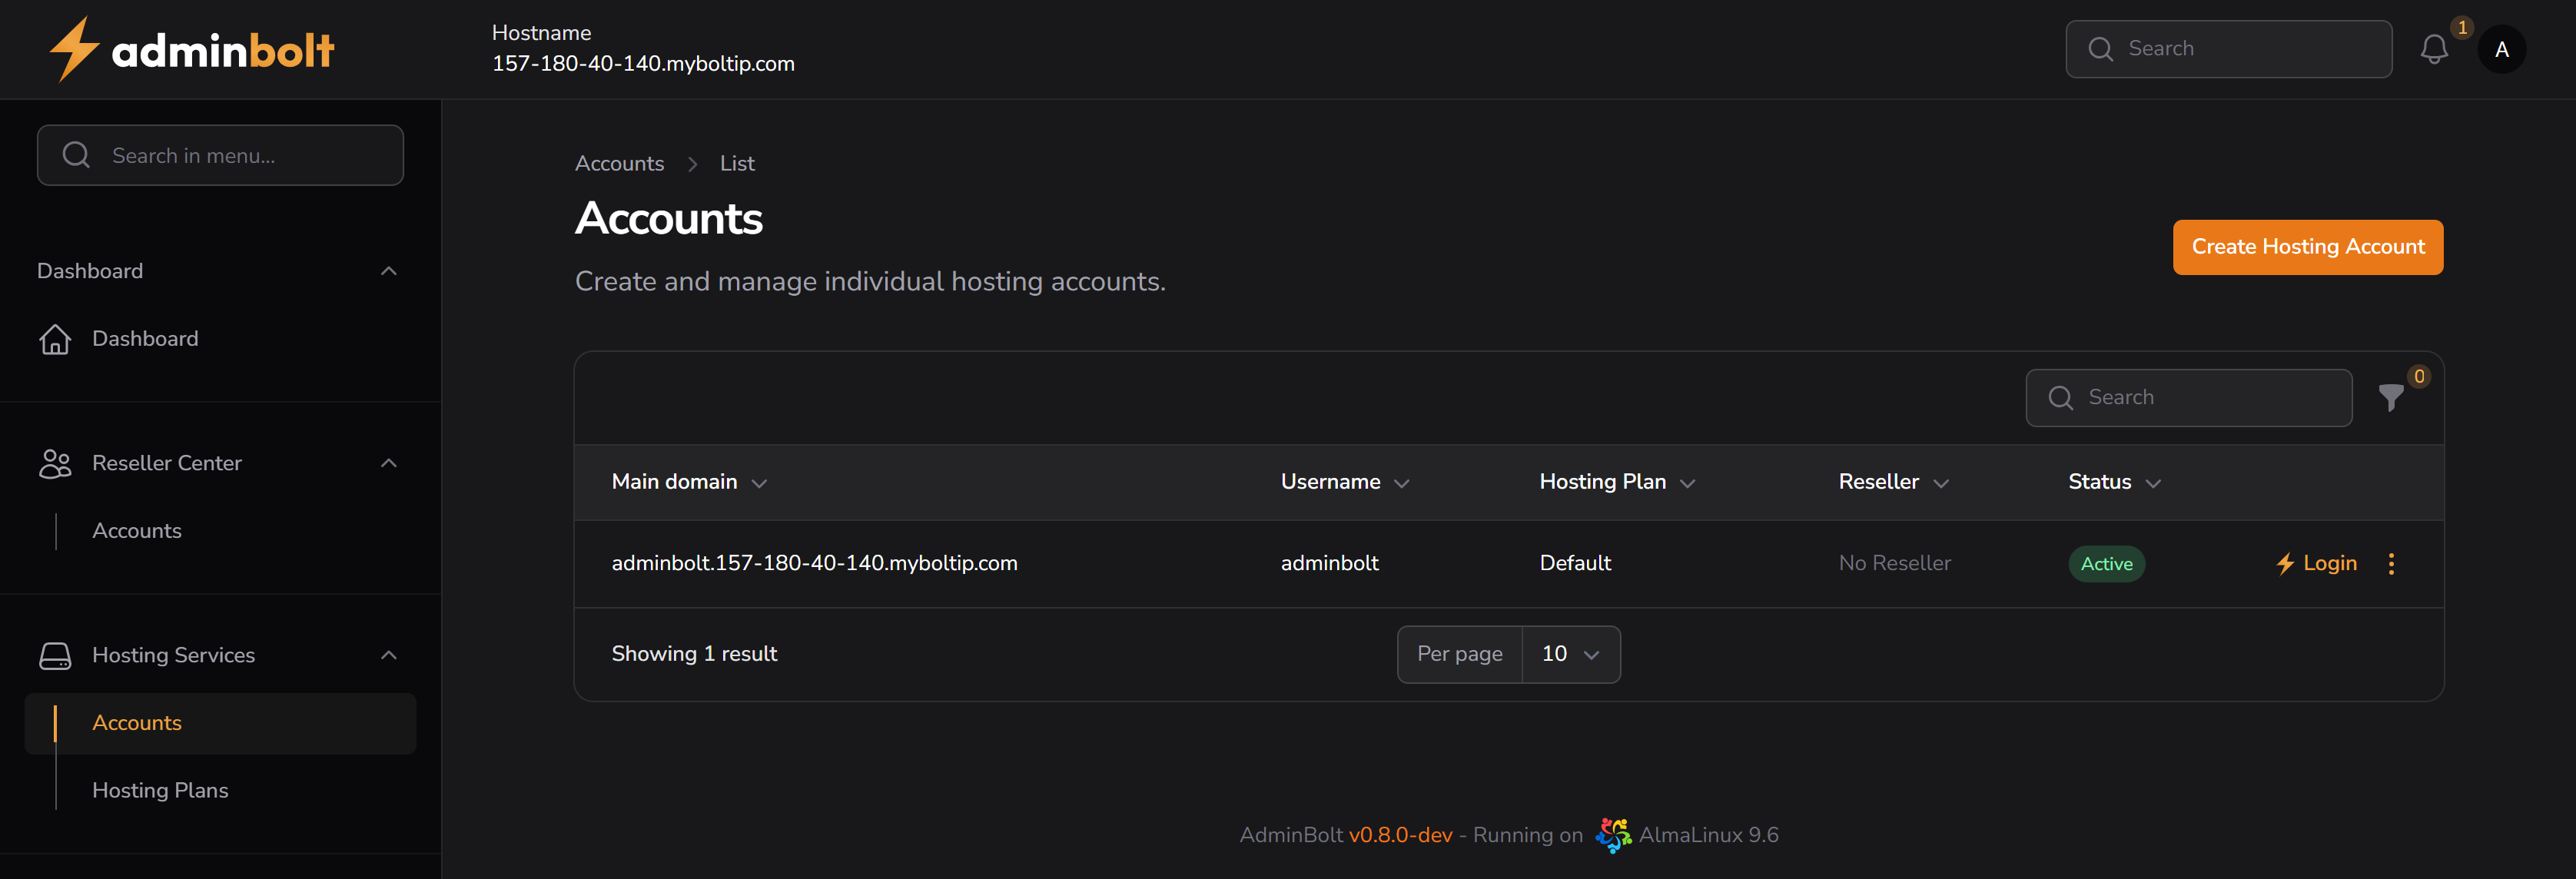
Interface (verified): Page heading Accounts (h1), intro Create and manage individual hosting accounts. Sub-navigation: Accounts (current), List. Button Create Account. Toolbar: Search, Filter (e.g. Filter 0), Toggle columns. Table lists accounts with columns and row actions as below.
This page displays all created hosting accounts, along with the following columns:
- Main Domain – Primary domain assigned to the account
- Username – System username of the hosting account
- Hosting Plan – Assigned hosting plan (e.g. Default)
- Reseller – Associated reseller (if any)
- Status – Account status (Active, Suspended)
Actions
- Login – Allows administrators to impersonate the user (impersonation mode)
- More options (⋮):
- Usage Details – View live usage data for disk, bandwidth, databases, email, etc.
- Edit Hosting Account – Change hosting plan, reseller, or SSH access
- Open Website / Open Website (local) – Visit hosted domain
- Change Password – Update the account password
- Suspend – Temporarily disable account access
- Delete – Permanently delete the account
Search and Filtering
Search – Filters records by the following fields:
- Main Domain
- Username
- Hosting Plan
- Reseller
- Status
Filter – Located next to the search bar:
- Filter by Hosting Plan
- Filter by Reseller
- Includes a Reset button to clear all filters
Creating a Hosting Account
Clicking the Create Hosting Account button opens the configuration modal:
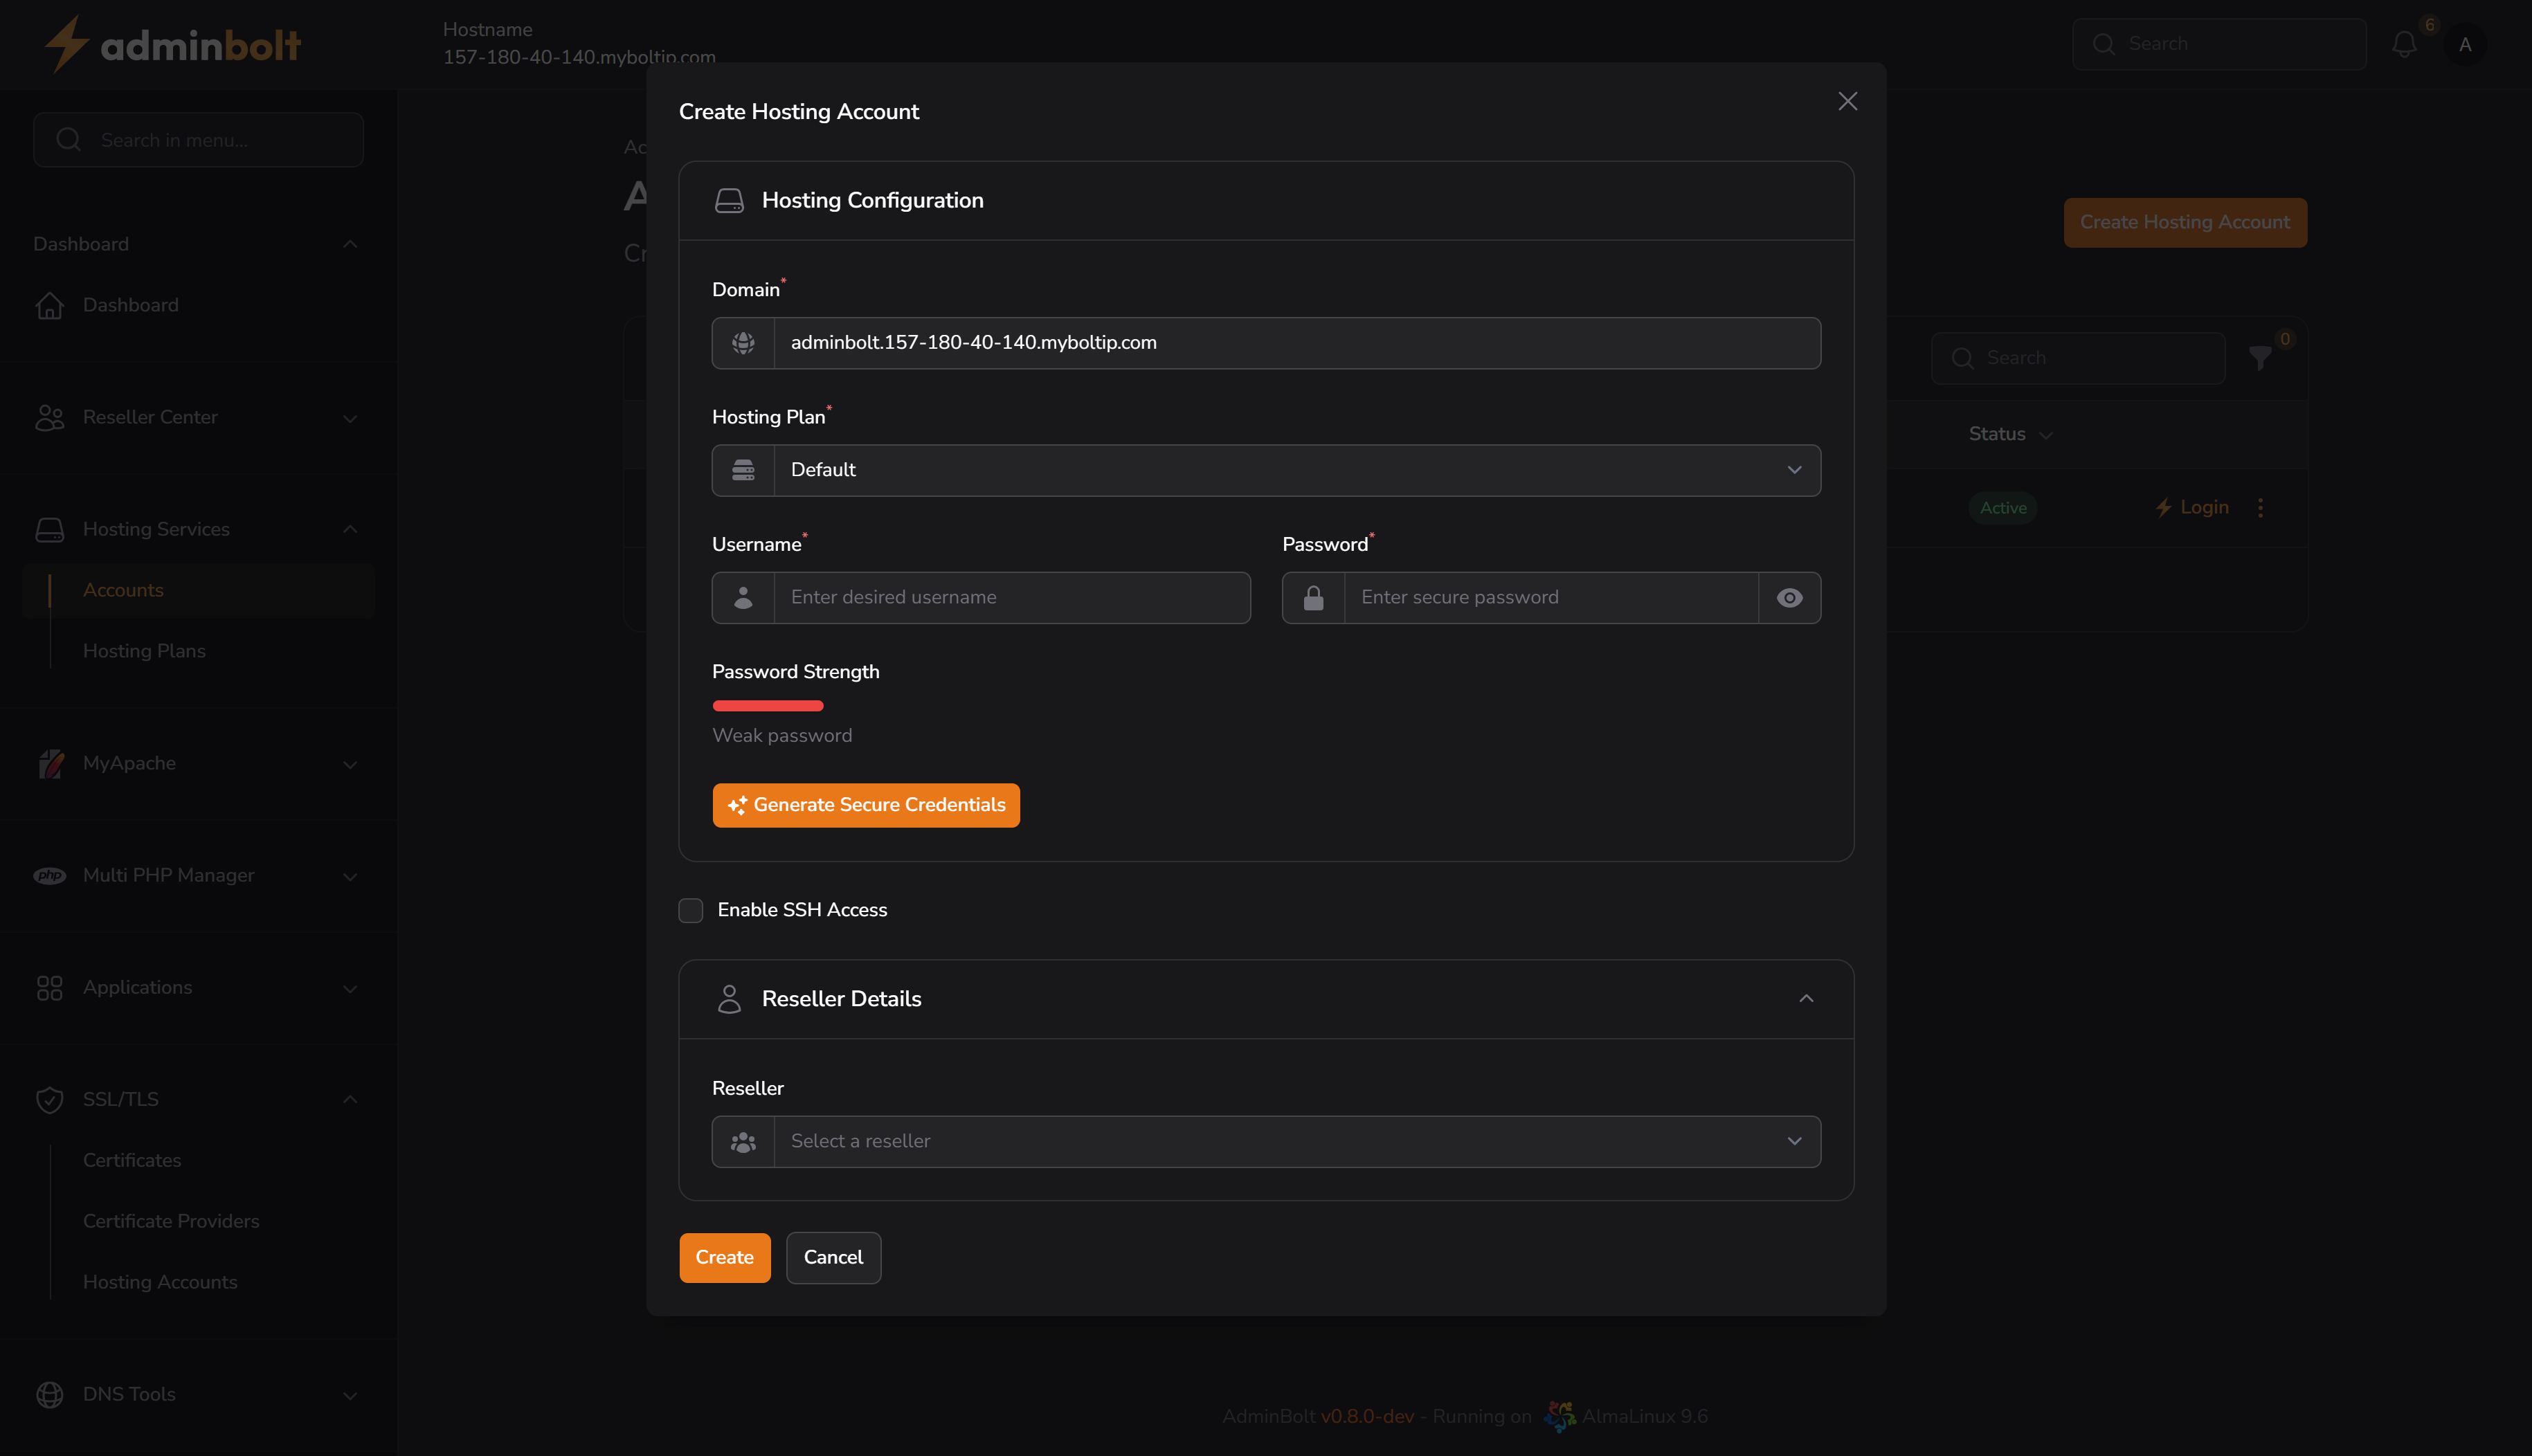
Hosting Configuration
- Domain (required) – Main domain name for the account
- Hosting Plan (required) – Select one of the available hosting plans
- Username (required) – System username
- Password (required) – Secure password input
- Password strength is displayed
- You can click “Generate Secure Credentials” for an auto-generated strong password
- Enable SSH Access – Optional toggle to enable shell access
Reseller Details
- Reseller – Assign the account to a reseller (optional)
Click Create to finalize the hosting account.
Impersonating a User
Clicking the Login button next to a hosting account will impersonate that user and open their dashboard.
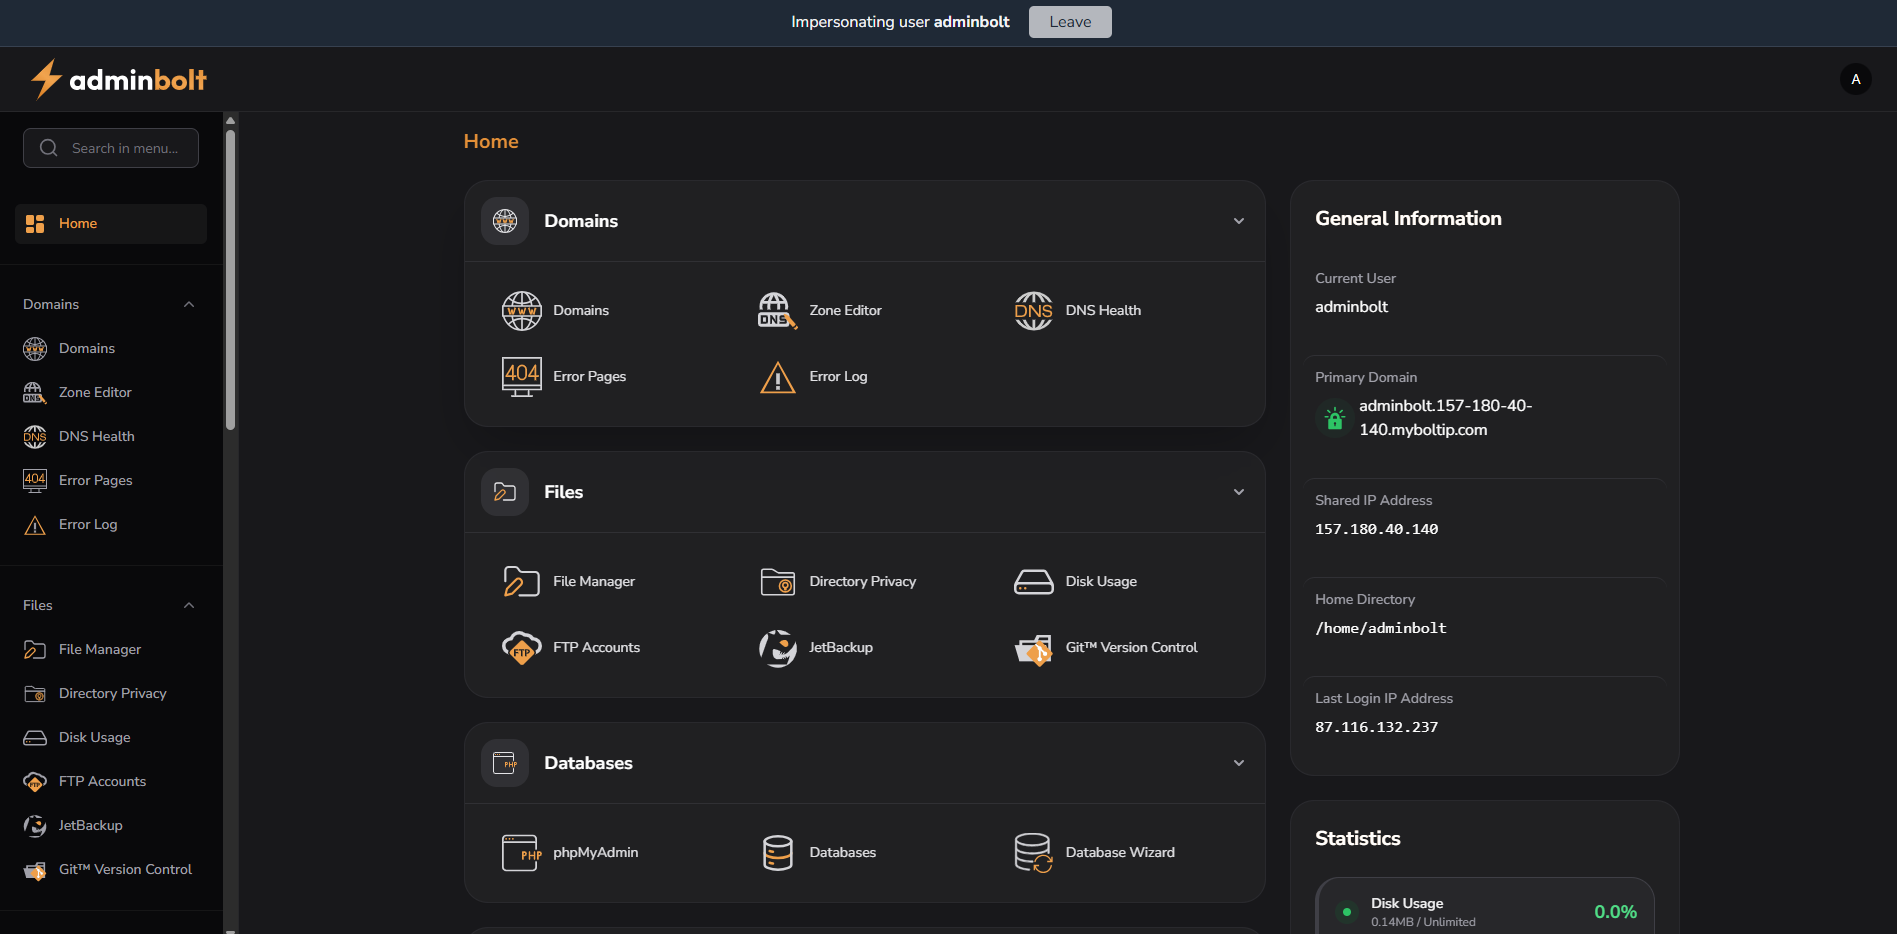
While impersonating:
- A blue bar appears at the top of the screen indicating "Impersonating user {username}"
- You will see the user's interface exactly as they would
- To exit impersonation mode, click the Leave button in the top bar
Viewing Hosting Account Usage
You can view detailed usage per account:
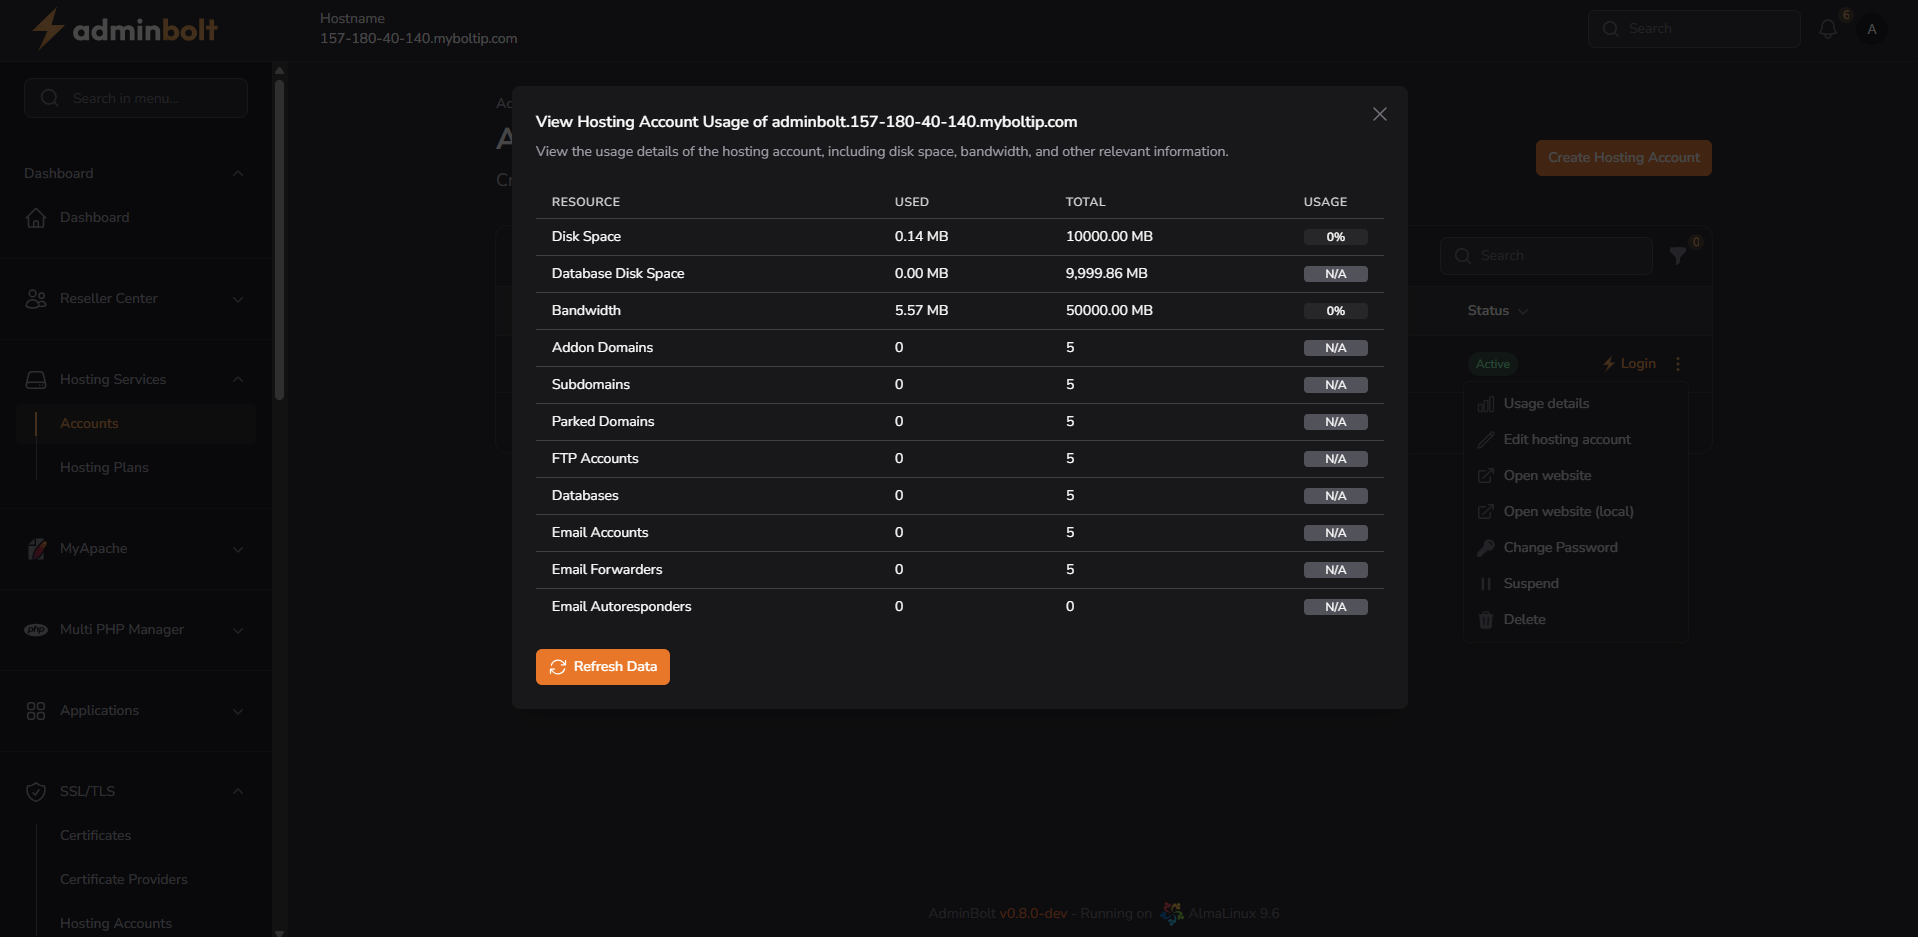
This dialog displays current usage vs. limits for various hosting resources, including:
| Resource | Used | Total | Usage |
|---|---|---|---|
| Disk Space | e.g. 0.14 MB | e.g. 10000 MB | e.g. 0% |
| Database Disk Space | e.g. 0.00 MB | e.g. 9999.86 MB | e.g. N/A |
| Bandwidth | e.g. 5.57 MB | e.g. 50000 MB | e.g. 0% |
| Addon Domains | e.g. 2 | e.g. 5 | e.g. 40% |
| Subdomains | e.g. 1 | e.g. 5 | e.g. 20% |
| Parked Domains | e.g. 0 | e.g. 5 | e.g. 0% |
| FTP Accounts | e.g. 3 | e.g. 5 | e.g. 60% |
| Databases | e.g. 2 | e.g. 5 | e.g. 40% |
| Email Accounts | e.g. 4 | e.g. 5 | e.g. 80% |
| Email Forwarders | e.g. 1 | e.g. 5 | e.g. 20% |
| Email Autoresponders | e.g. 0 | e.g. 5 | e.g. 0% |
Note: Values shown above are examples. The actual usage will depend on each individual account's activity and plan limits.
You can click Refresh Data to update usage stats.
Editing a Hosting Account
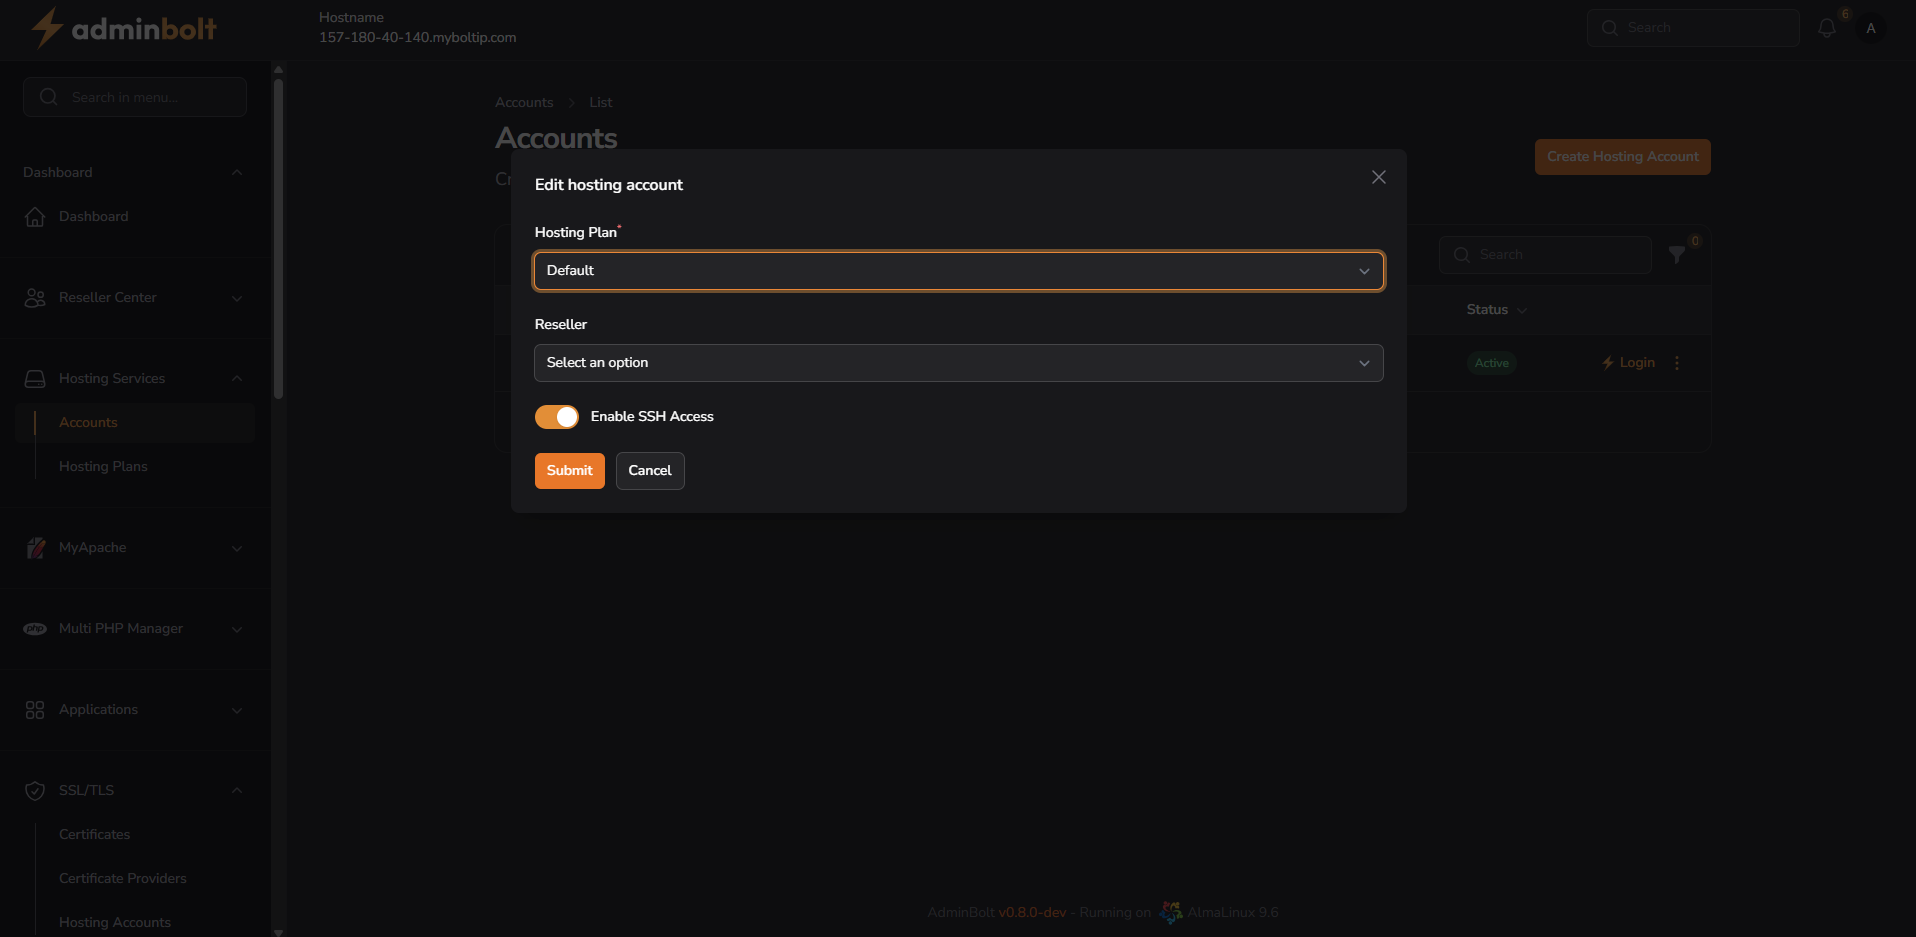
You can modify:
- Hosting Plan – Reassign the user to a different plan
- Reseller – Assign or change the reseller
- SSH Access – Toggle SSH on or off
Click Submit to apply changes.
Changing Password
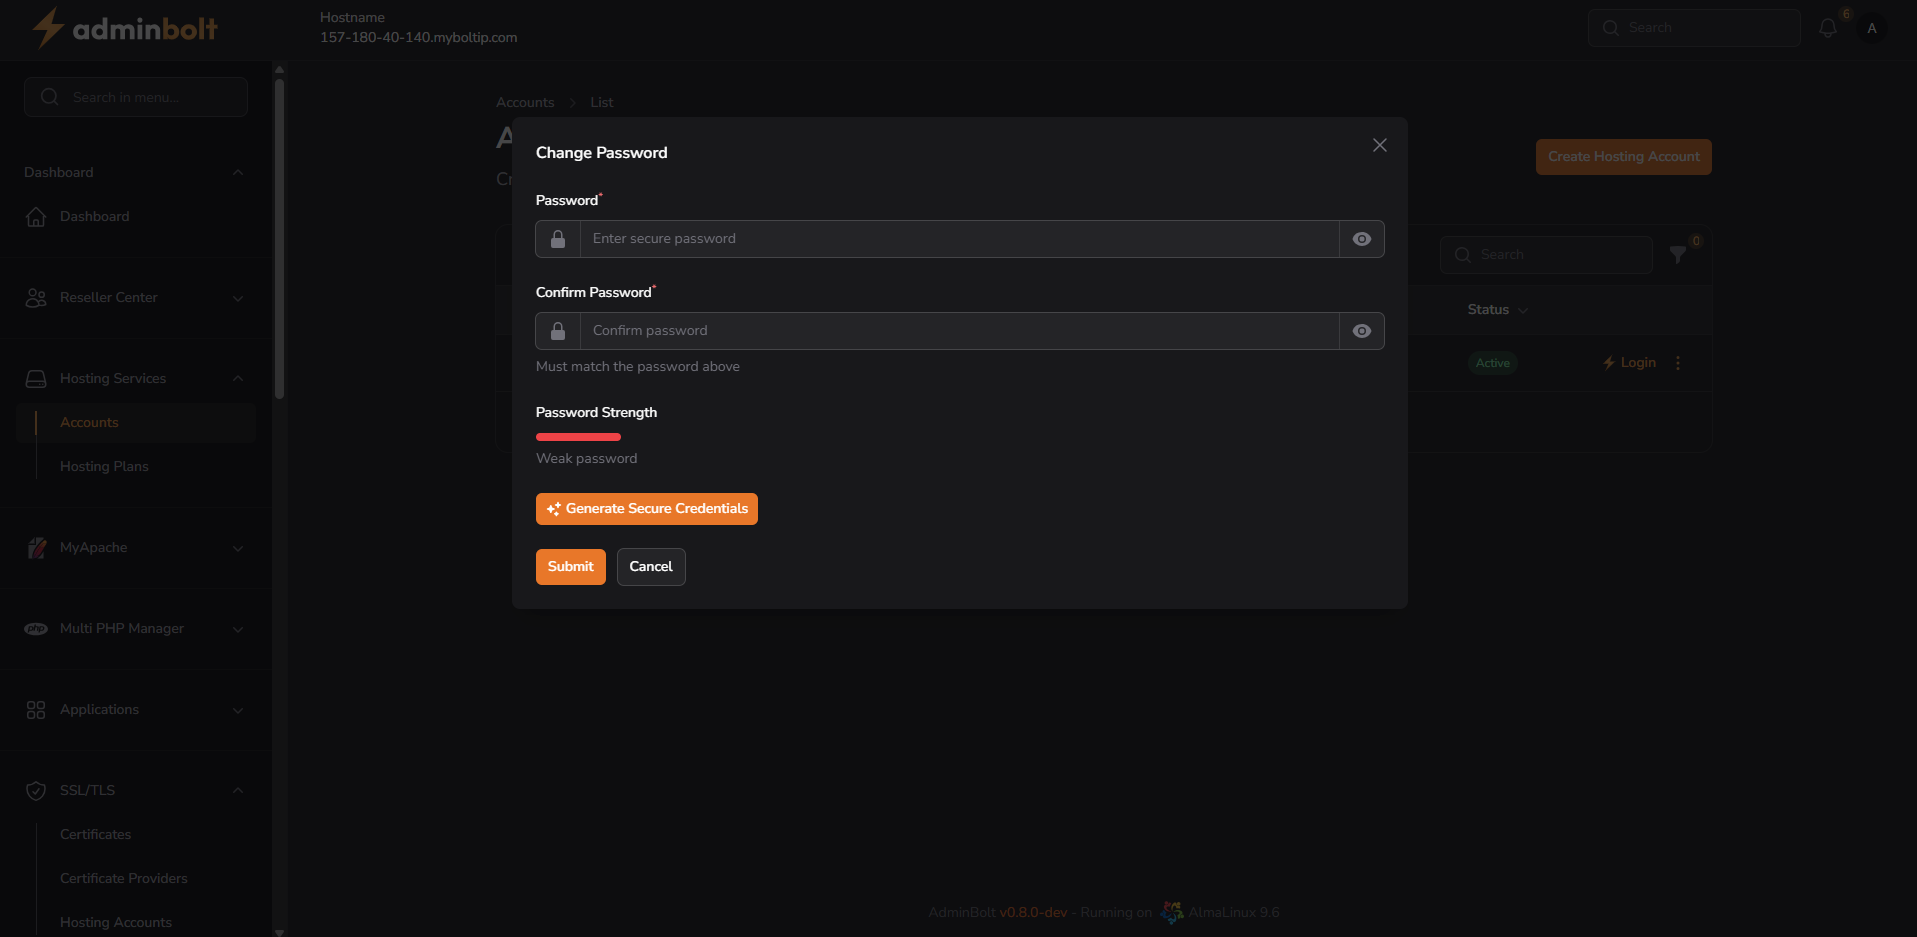
From the dropdown menu (⋮), select Change Password.
- Enter a new password and confirm it
- Password strength will be displayed
- You can auto-generate a secure password with the built-in generator
- Click Submit to apply the new password