

Accounts
The Accounts page allows administrators to create, manage, and monitor individual hosting accounts under a specific hosting plan.
Overview
URL: /admin/hosting-accounts
This page displays all created hosting accounts. The default visible columns are:
- Username - Account username
- Setup Date - When the account was created
- Quota - Disk quota assigned to the account
- Disk Used - Current disk usage
- Package - The hosting plan assigned to the account
- Reseller/Owner - The reseller or owner of the account
- Suspended - Whether the account is suspended
Toggle Columns
Additional columns can be shown or hidden using the Toggle columns button (grid icon). Available columns include: Disk Usage, Disk Warning, DB Disk Usage, Bandwidth, Addon Domains, Subdomains, Alias Domains, FTP Accounts, Databases, Email Accounts, Email Forwarders, Email Autoresponders, Domain, Feature List, Status, Provision State.
Actions
- Login - Allows administrators to impersonate the user (impersonation mode)
- More options menu:
- Usage Details - View live usage data for disk, bandwidth, databases, email, etc.
- Edit Account - Change hosting plan, reseller, or SSH access
- Change Password - Update the account password
- Suspend - Temporarily disable account access
- Delete - Permanently delete the account
Search and Filtering
Search - Filters records across visible columns.
Filter - Located next to the search bar:
- Filter by Hosting Plan
- Filter by Reseller
- Filter by Feature List
- Includes a Reset button to clear all filters
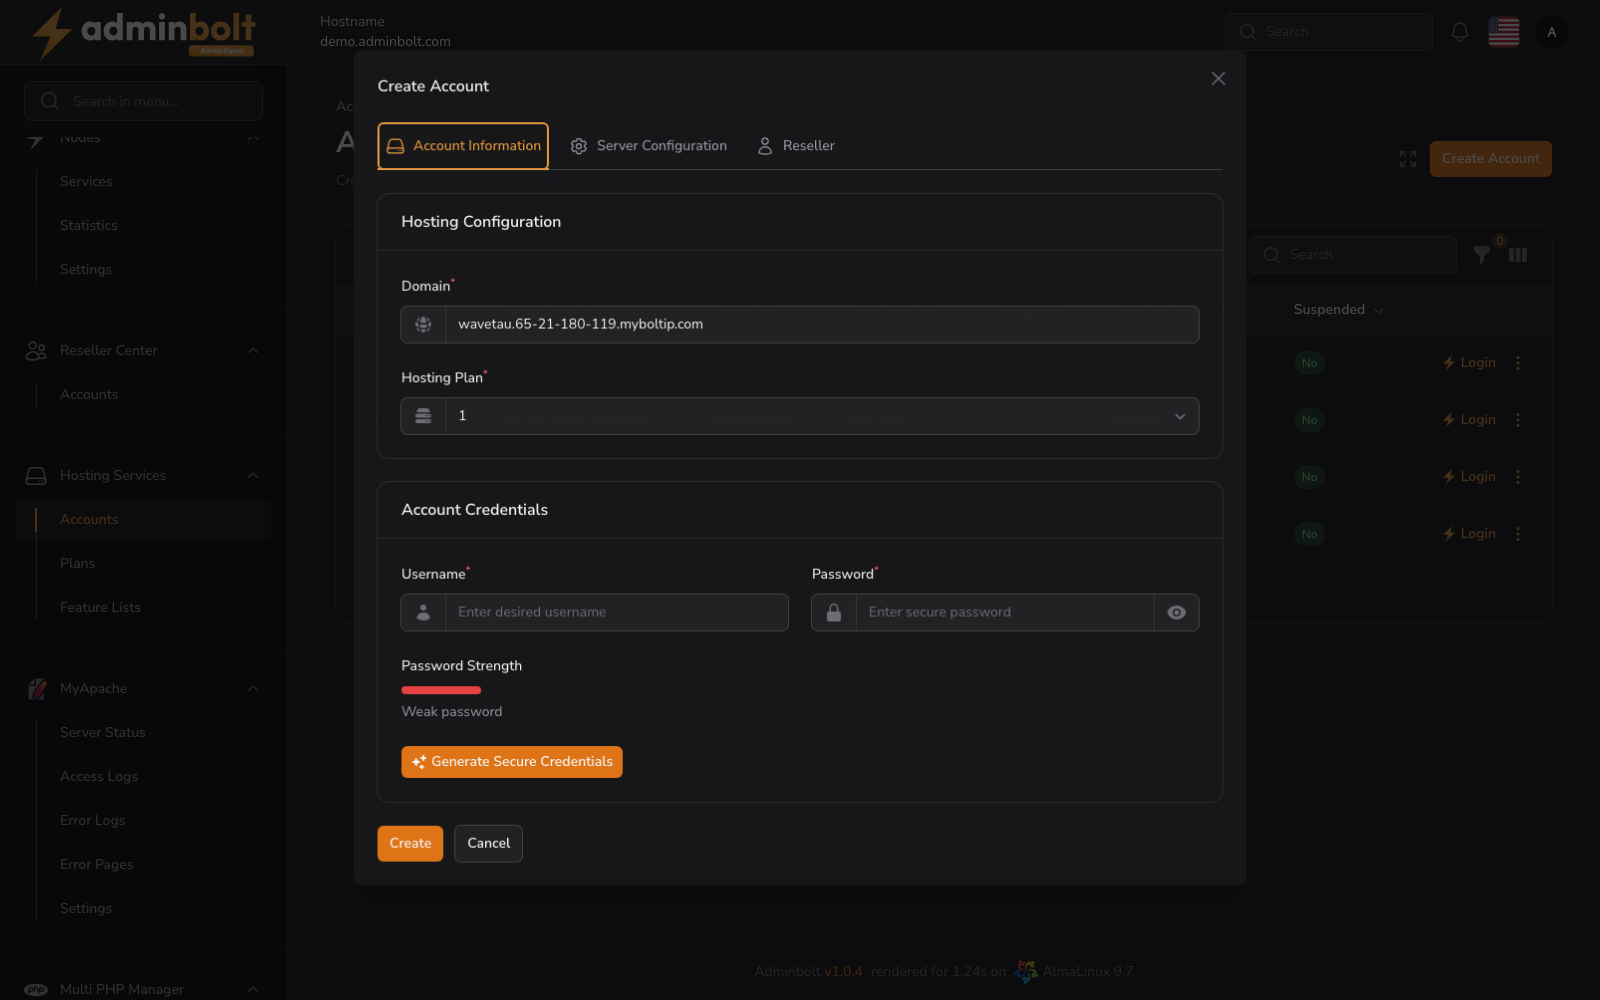
Creating a Hosting Account
Clicking the Create Account button opens a modal with two tabs: Account Information and Reseller.
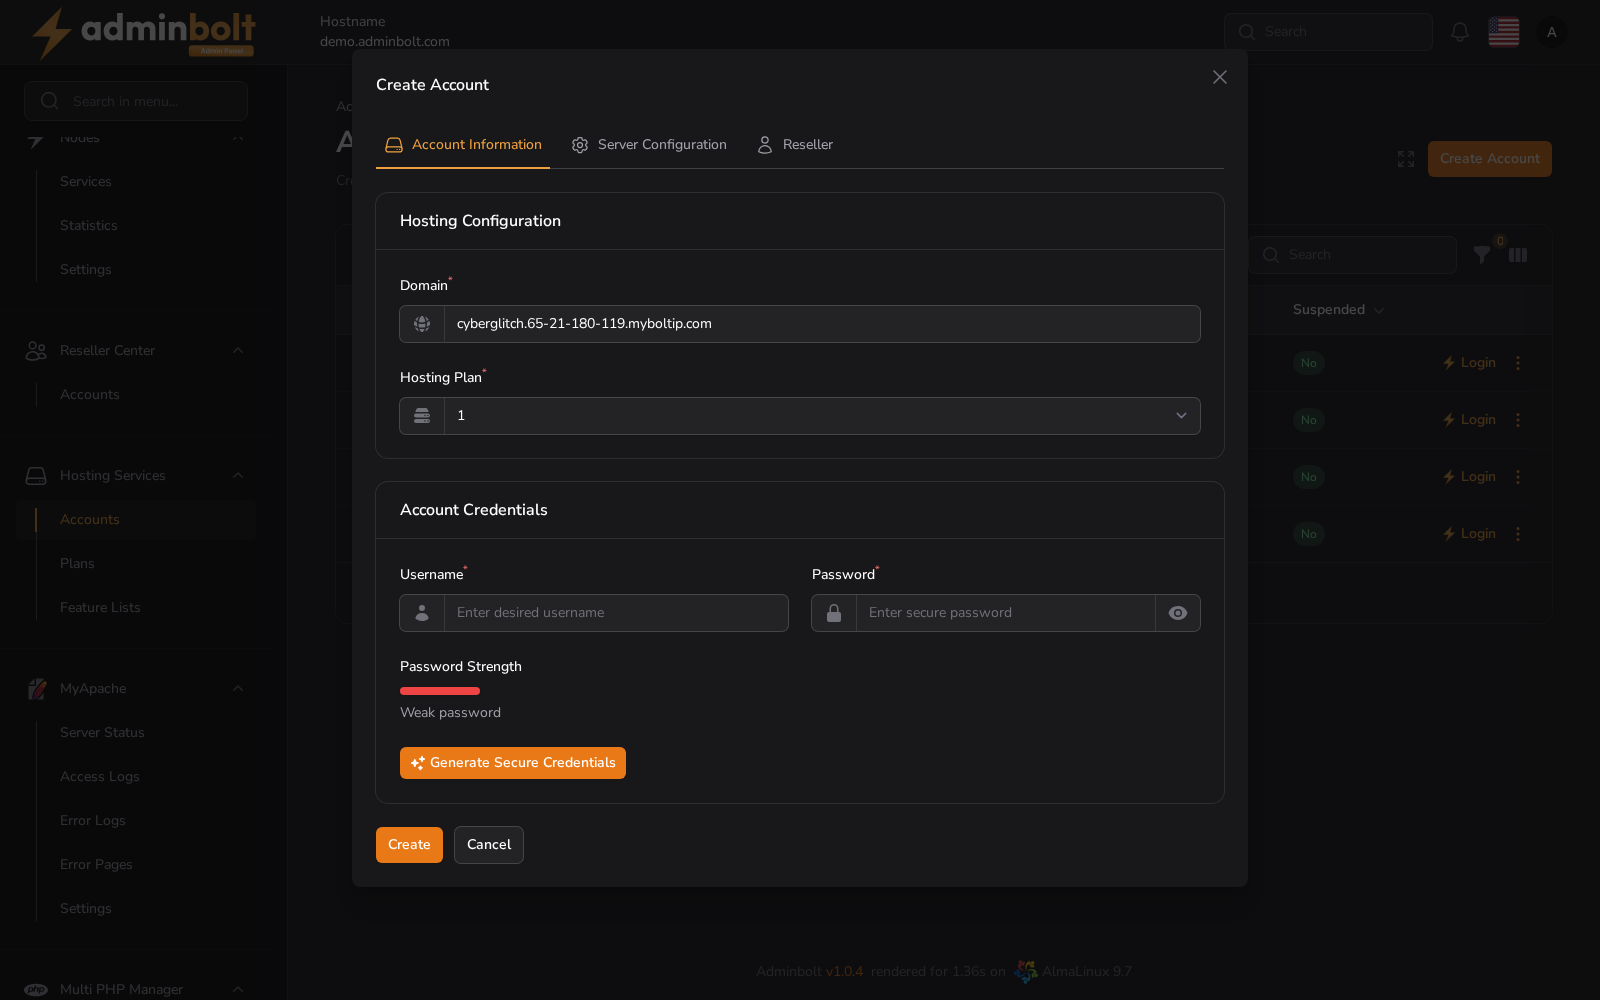
Tab 1: Account Information
Hosting Configuration
- Domain (required) - Main domain name for the account. A default subdomain is pre-filled based on the server hostname.
- Hosting Plan (required) - Select one of the available hosting plans from the dropdown.
Account Credentials
- Username (required) - System username for the hosting account.
- Password (required) - Secure password input with a strength indicator.
- Password strength is displayed below the field (e.g., "Weak password", "Strong password").
- Click Generate Secure Credentials to auto-generate a strong password.
Tab 2: Reseller
Reseller Details
- Reseller - Assign the account to a reseller (optional). Select from the dropdown or leave empty.
Buttons
- Create - Save the hosting account.
- Cancel - Close the modal without saving.
Impersonating a User
Clicking the Login button next to a hosting account will impersonate that user and open their dashboard.
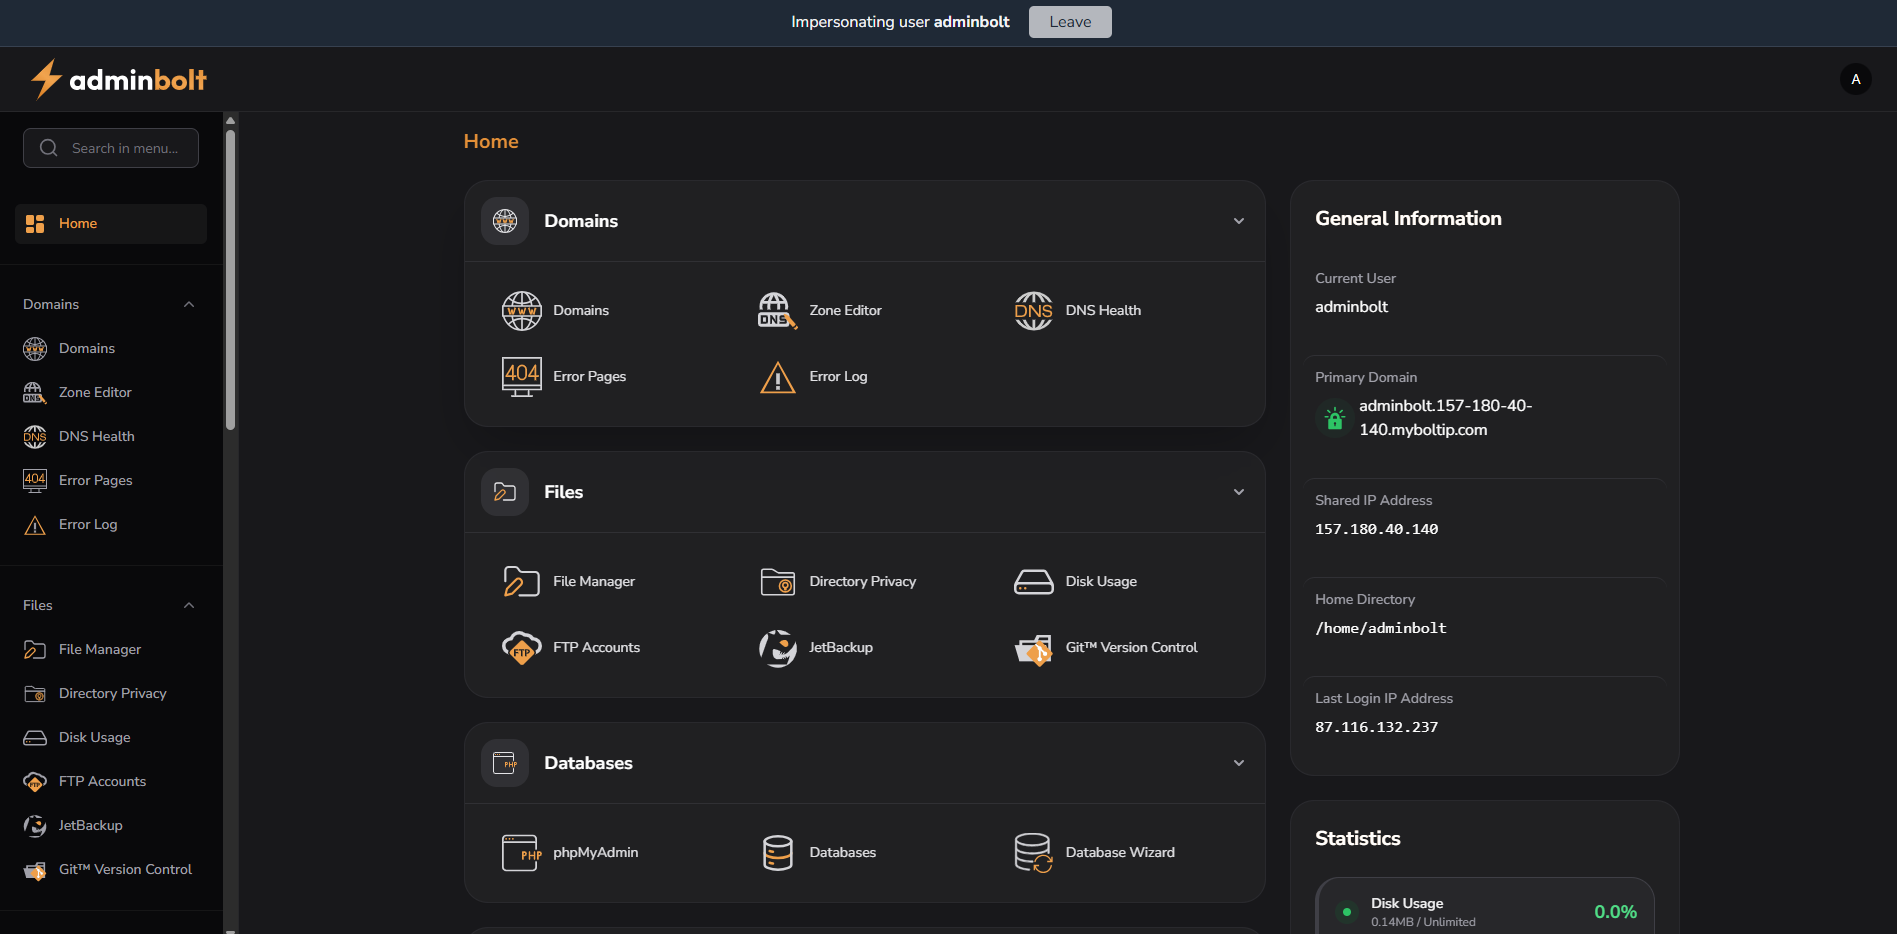
While impersonating:
- A blue bar appears at the top of the screen indicating "Impersonating user {username}"
- You will see the user's interface exactly as they would
- To exit impersonation mode, click the Leave button in the top bar
Viewing Hosting Account Usage
You can view detailed usage per account:
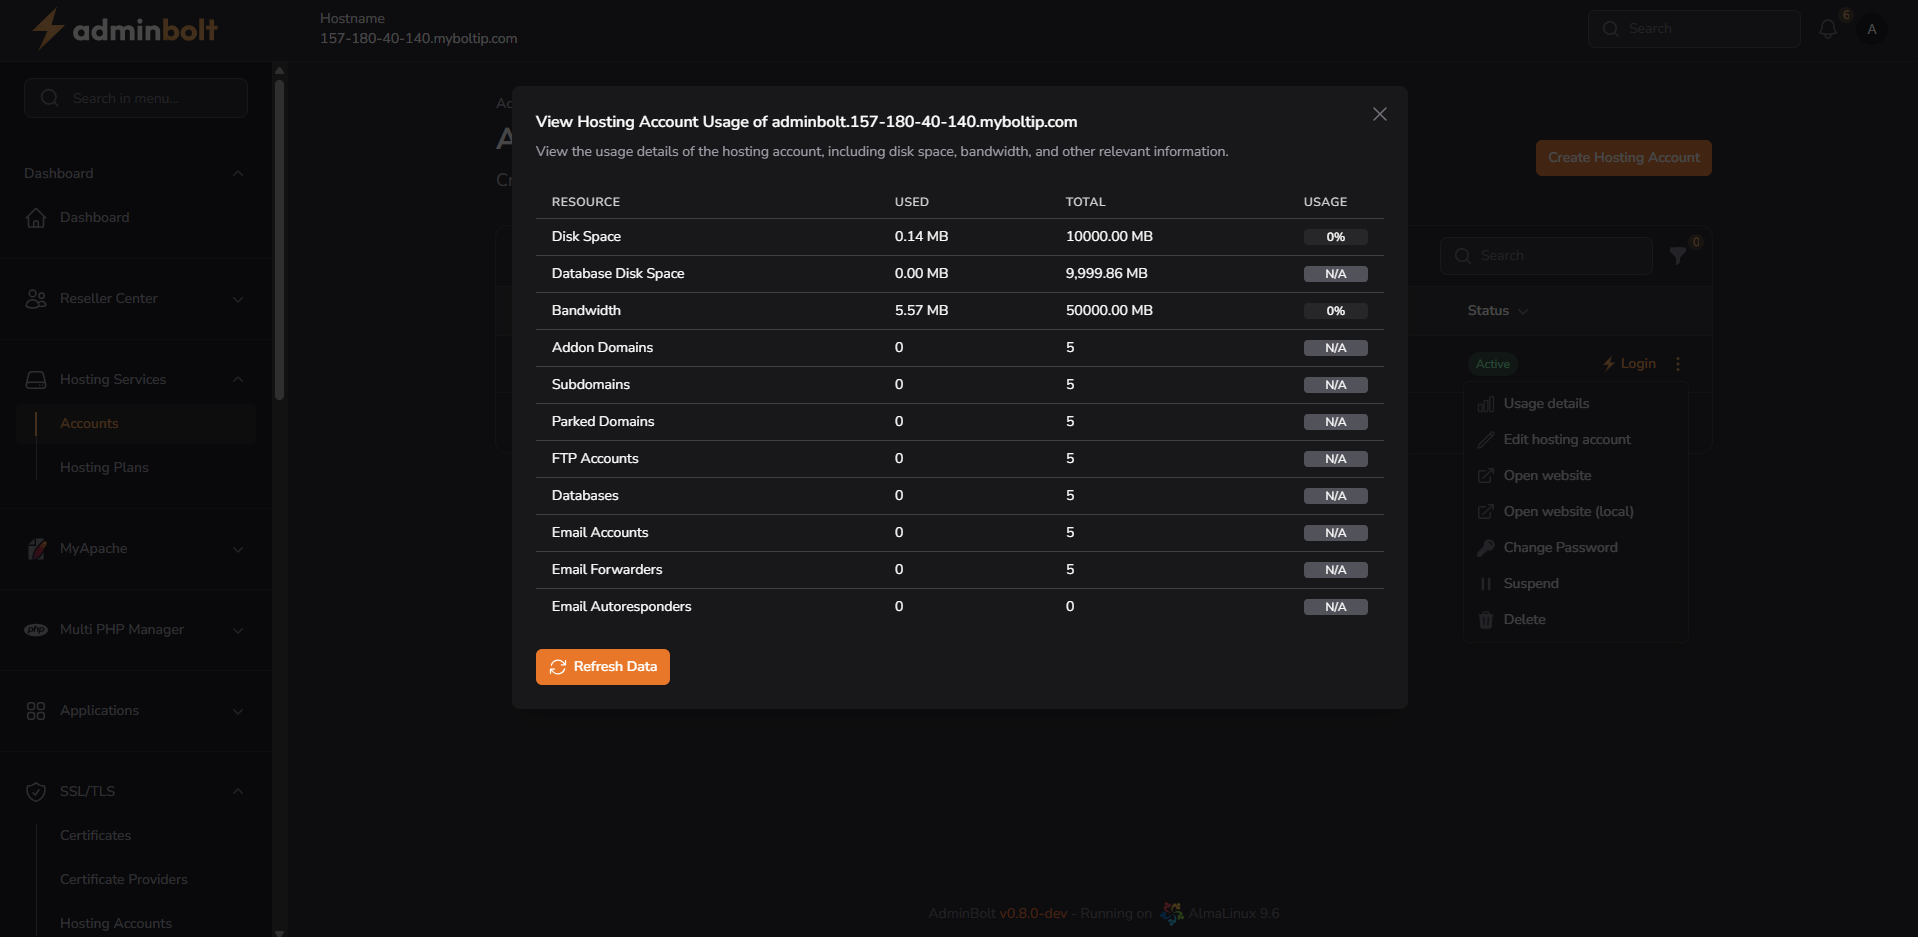
This dialog displays current usage vs. limits for various hosting resources, including:
| Resource | Used | Total | Usage |
|---|---|---|---|
| Disk Space | e.g. 0.14 MB | e.g. 10000 MB | e.g. 0% |
| Database Disk Space | e.g. 0.00 MB | e.g. 9999.86 MB | e.g. N/A |
| Bandwidth | e.g. 5.57 MB | e.g. 50000 MB | e.g. 0% |
| Addon Domains | e.g. 2 | e.g. 5 | e.g. 40% |
| Subdomains | e.g. 1 | e.g. 5 | e.g. 20% |
| Alias Domains | e.g. 0 | e.g. 5 | e.g. 0% |
| FTP Accounts | e.g. 3 | e.g. 5 | e.g. 60% |
| Databases | e.g. 2 | e.g. 5 | e.g. 40% |
| Email Accounts | e.g. 4 | e.g. 5 | e.g. 80% |
| Email Forwarders | e.g. 1 | e.g. 5 | e.g. 20% |
| Email Autoresponders | e.g. 0 | e.g. 5 | e.g. 0% |
Note: Values shown above are examples. The actual usage will depend on each individual account's activity and plan limits.
You can click Refresh Data to update usage stats.
Editing a Hosting Account
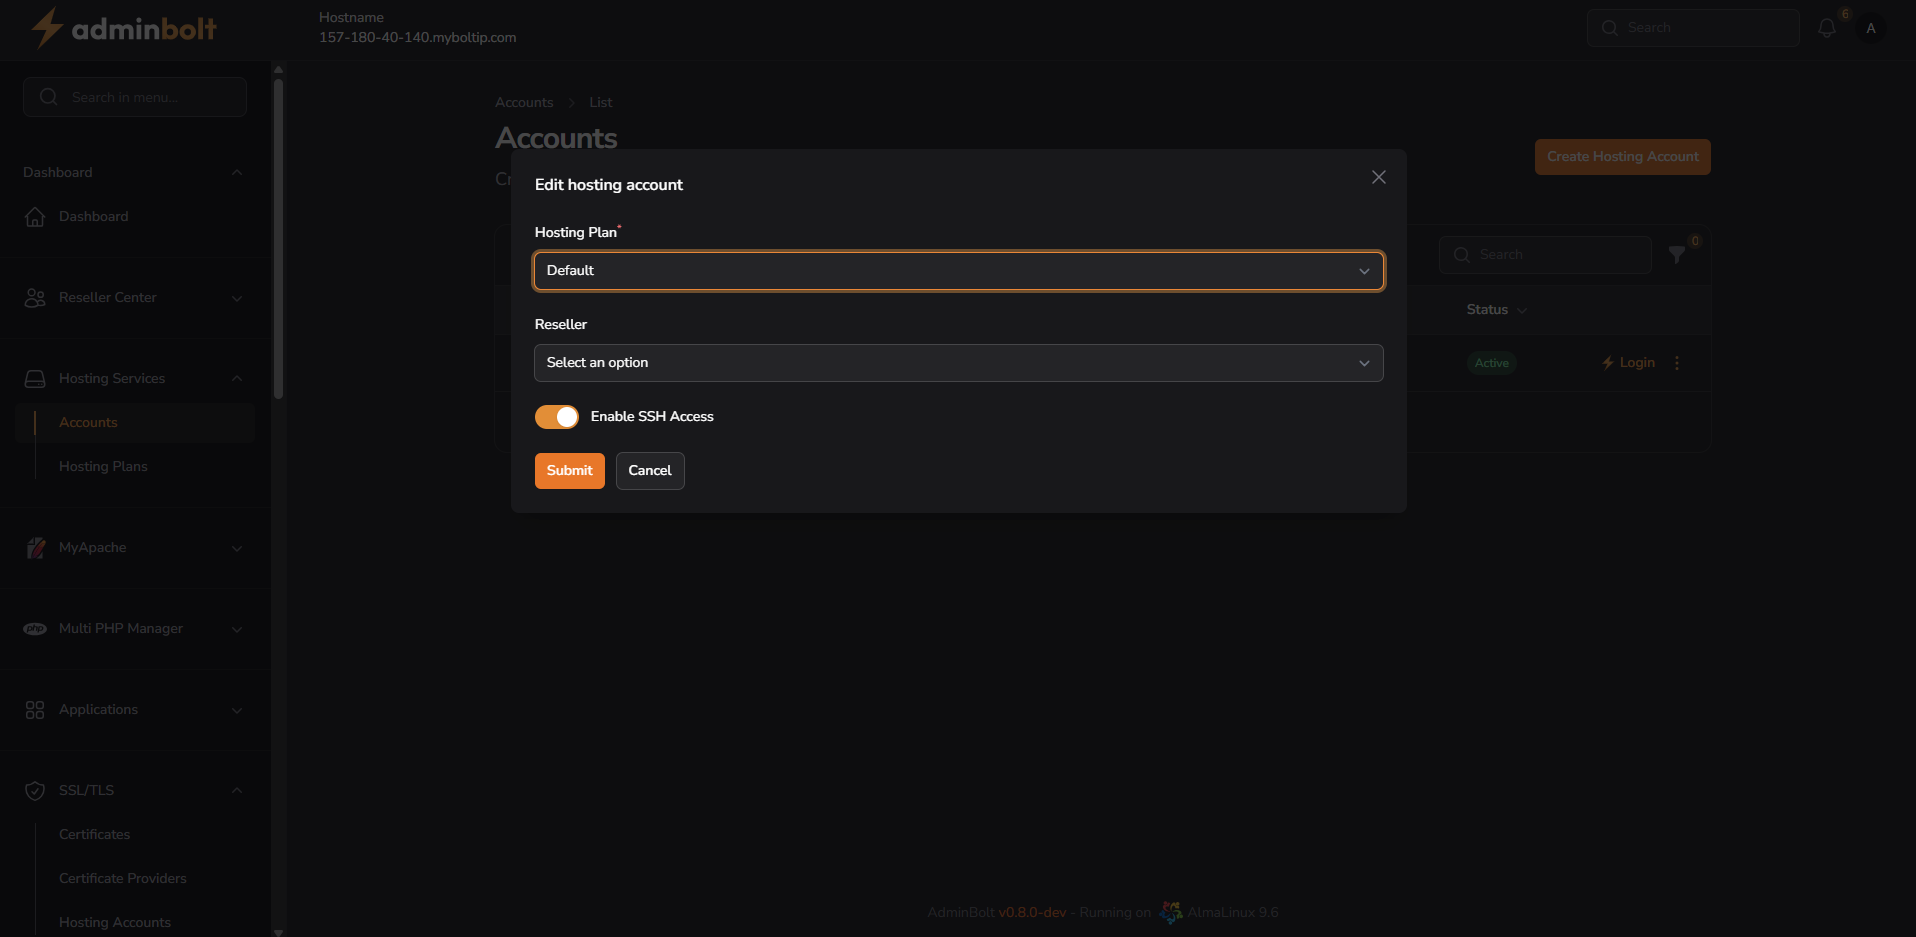
You can modify:
- Hosting Plan - Reassign the user to a different plan
- Reseller - Assign or change the reseller
- SSH Access - Toggle SSH on or off
Click Submit to apply changes.
Changing Password
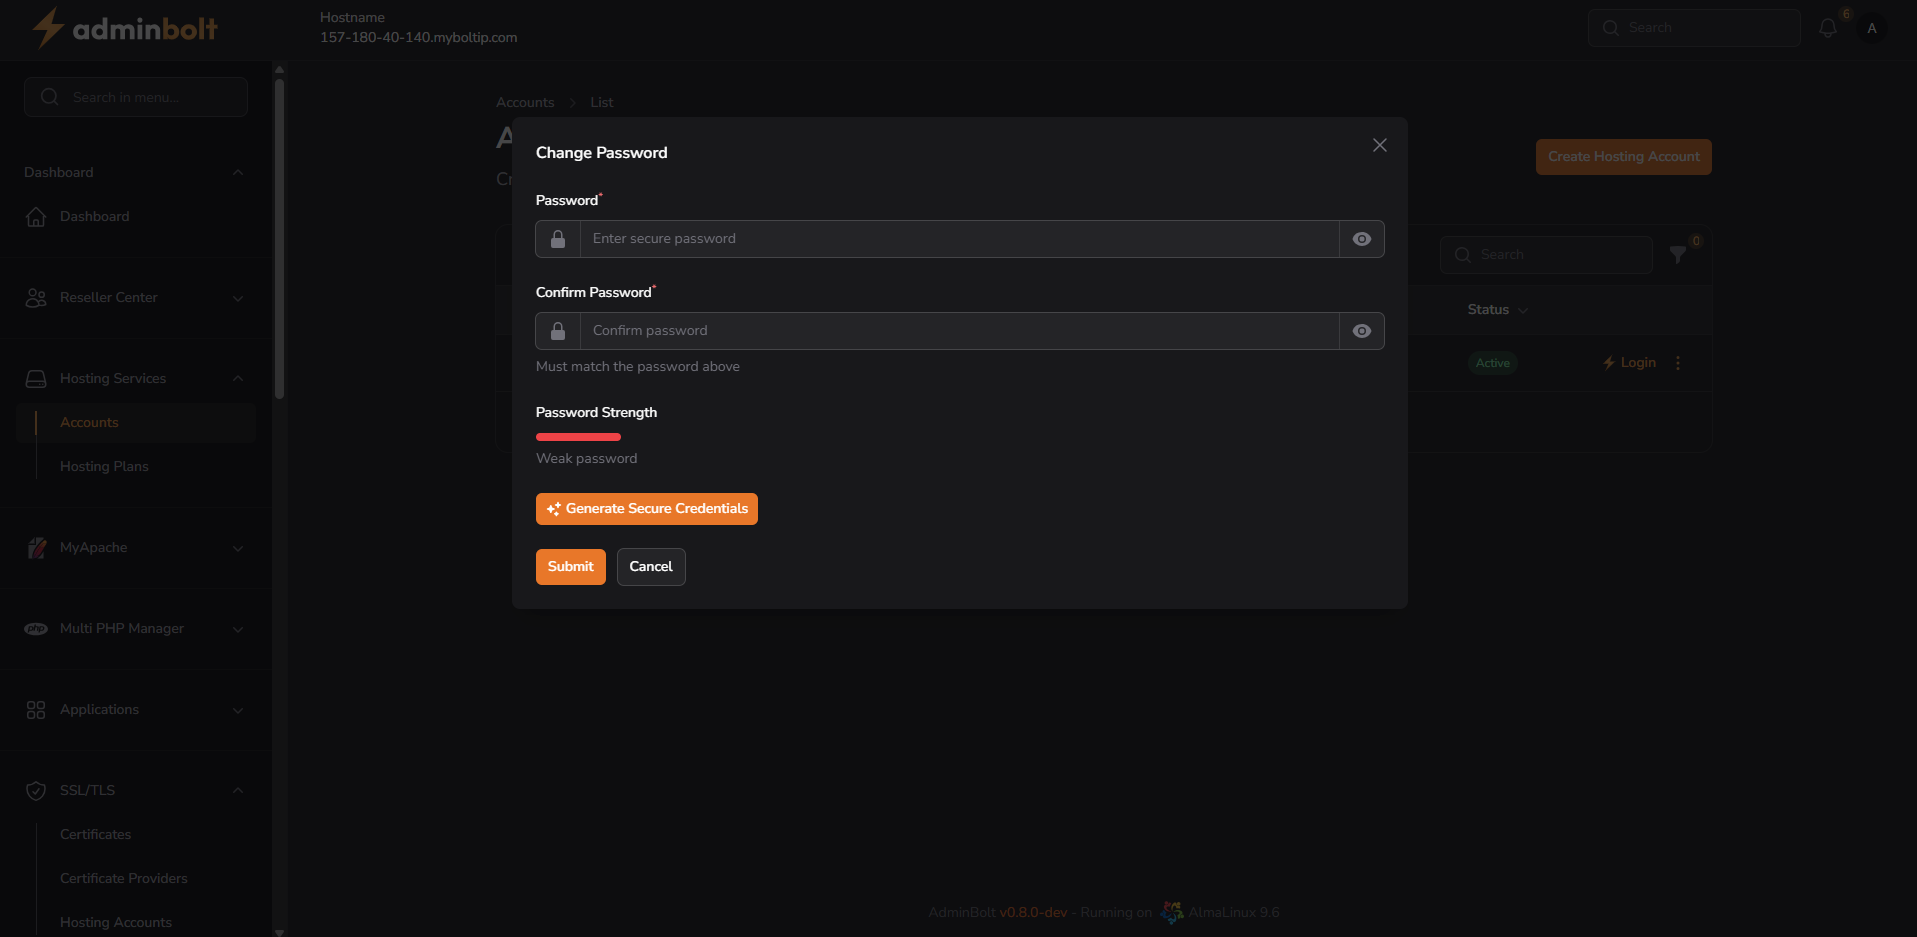
From the dropdown menu, select Change Password.
- Enter a new password and confirm it
- Password strength will be displayed
- You can auto-generate a secure password with the built-in generator
- Click Submit to apply the new password