

Cloudflare
The Cloudflare page connects your Cloudflare account to AdminBolt, so you can add a domain to Cloudflare, keep its DNS records in step with the panel, and control caching without leaving the client panel.
Overview
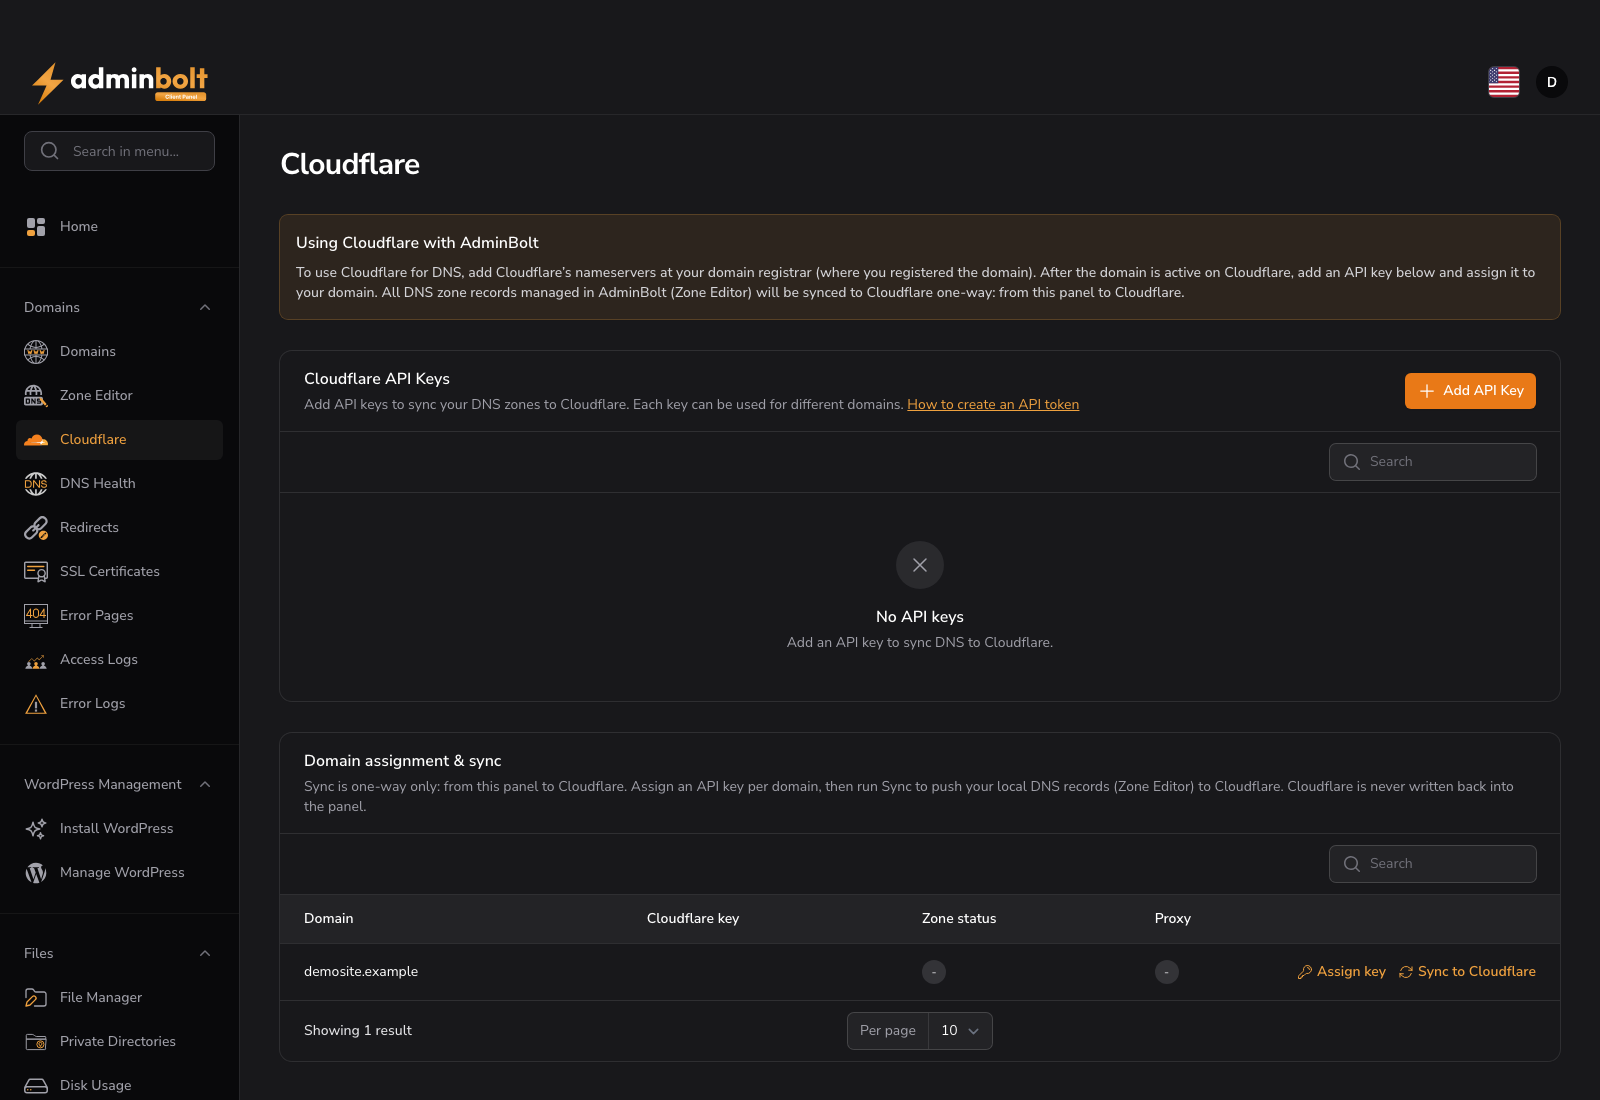
URL: /client/cloudflare-page - under Domains.
Sync is one way
Records are pushed from AdminBolt to Cloudflare only. Cloudflare is never read back into the panel. Edit your records in the Zone Editor and let AdminBolt push them; a change made directly in the Cloudflare dashboard is overwritten on the next sync.
1. Add an API token
The Cloudflare API Keys table holds the Cloudflare credentials available to your account. A How to create an API token link next to it opens Cloudflare's own instructions.
- Add API Key - opens a form with two fields:
- Label - a name for the token, so you can tell several tokens apart.
- API Token - a Cloudflare API token. Create it in your Cloudflare dashboard with permission to edit DNS for the zones you want to manage.
- Test - checks the token against the Cloudflare API and reports Connection successful or Connection failed with the reason. Run this before assigning the token to a domain.
- Edit - change the label, or replace the token.
- Delete - remove the token.
The Domains column shows which of your domains currently use each token.
2. Assign a token to a domain
The Domain assignment & sync table lists the domains on your hosting account.
| Column | Description |
|---|---|
| Domain | A domain on your account. |
| Cloudflare key | The API token assigned to it, if any. |
| Zone status | No zone when the domain is not in Cloudflare, Pending nameservers while Cloudflare waits for the domain to be delegated to it, or Active once Cloudflare is serving the zone. When a zone exists, the assigned Cloudflare nameservers are shown. |
| Proxy | Proxied or DNS only, per the domain's proxy setting. |
Assign key opens a form with:
- API Key - which stored token manages this domain.
- Proxy traffic through Cloudflare - see Proxying below.
3. Create the zone
Create zone adds the domain to your Cloudflare account. When it succeeds, AdminBolt reports the nameservers Cloudflare assigned to the zone.
Cloudflare does not serve the domain until it is actually delegated to it. Complete the setup at your domain registrar:
- Note the two Cloudflare nameservers shown after the zone is created.
- Change the domain's nameservers at your registrar to those two values.
- Wait for the delegation to propagate. The Zone status column moves from Pending nameservers to Active.
4. Sync the records
Sync to Cloudflare pushes the DNS records held in the panel's Zone Editor to the Cloudflare zone.
Note: A domain starts with only Assign key and Sync to Cloudflare available. Create zone, Purge cache and the development mode action appear once the domain has a key assigned and a zone in Cloudflare to act on.
Proxying
With Proxy traffic through Cloudflare enabled for a domain, web records are pushed with Cloudflare proxying turned on, so visitor traffic passes through Cloudflare's network:
- Proxied -
A,AAAAandCNAMErecords that serve the website. - DNS only, always - mail and service hostnames. Cloudflare cannot proxy SMTP, IMAP or POP3, so proxying those records would break mail delivery. AdminBolt keeps them unproxied for you, whatever the toggle says.
Cache actions
Two actions are available per domain once its zone is active:
- Purge cache - clears the entire Cloudflare cache for that domain. Use it after publishing a change that visitors are not seeing.
- Enable development mode / Disable development mode - bypasses the Cloudflare cache so every change is visible immediately. Cloudflare turns development mode off automatically after 3 hours.
Related pages
- Zone Editor - the source of the records that are pushed to Cloudflare.
- Domains - the domains on your hosting account.
- SSL Certificates - certificates issued on the server itself.