

Install WordPress
Step-by-step wizard to install WordPress on any of your domains. Available from the client panel sidebar under Install WordPress.
Overview
URL: /client/wordpress-installer
The wizard walks you through five steps:
- Domain & Path — choose where to install
- Site Configuration — title, description, search engine visibility
- Admin Account — username, email, password
- Advanced Options — debug mode, clean existing files, language, timezone
- Review & Install — final summary before installation starts
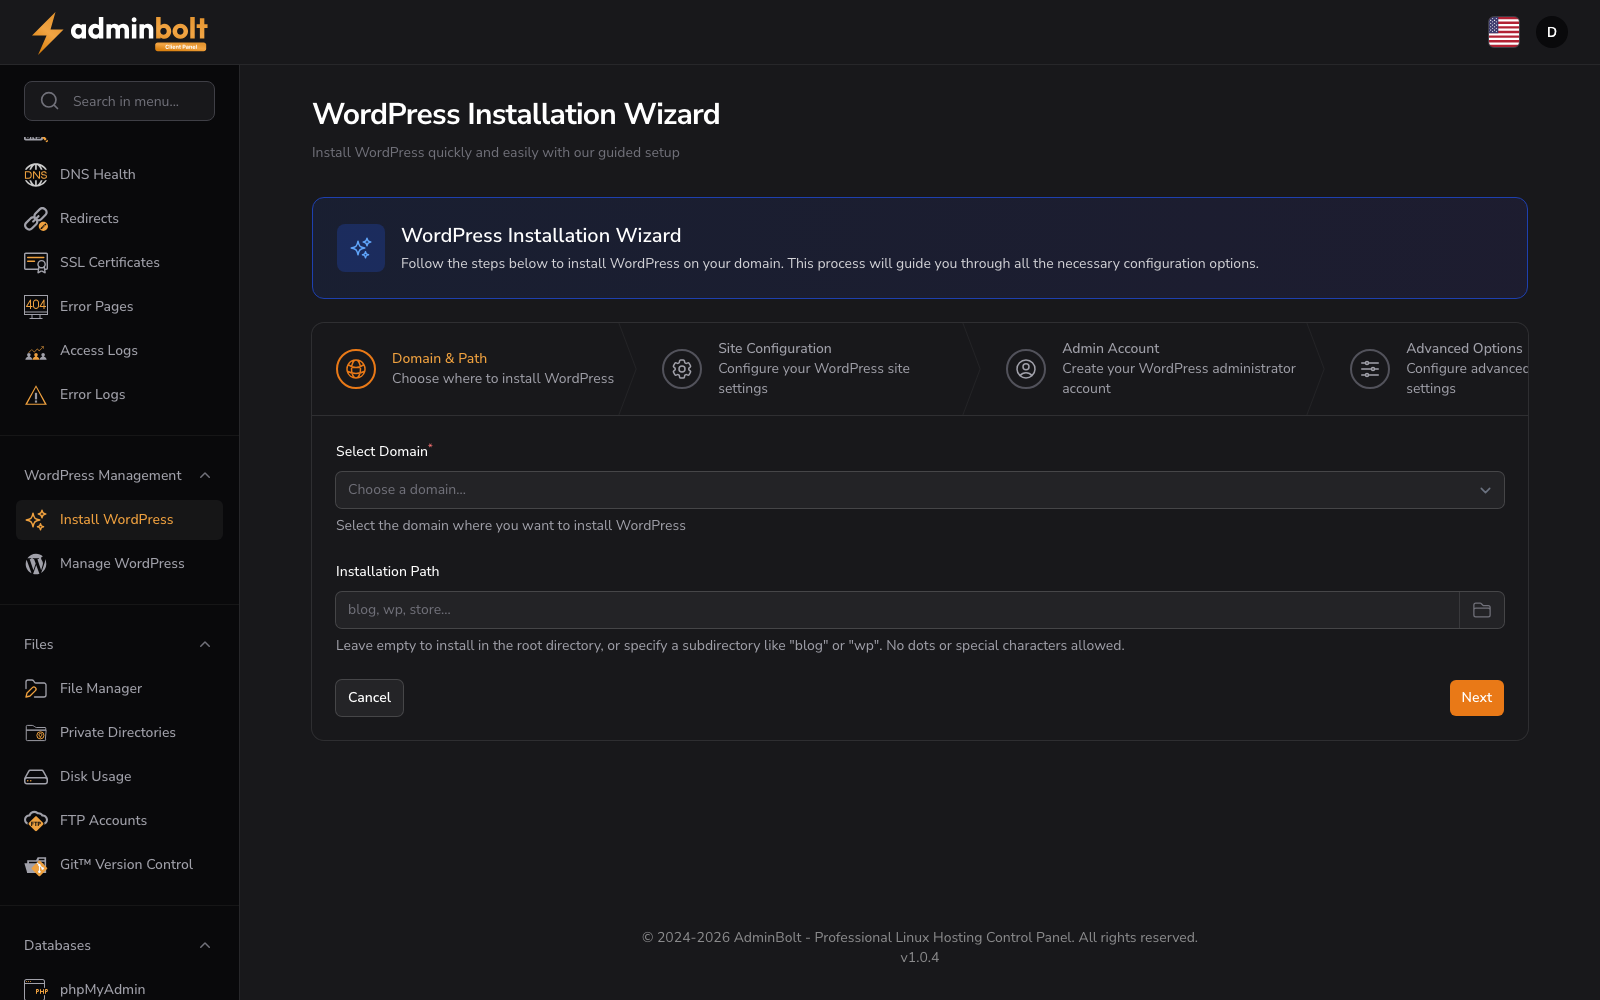
Step 1: Domain & Path
- Select Domain (required) — pick one of your domains from the dropdown.
- Installation Path — leave empty for root, or specify a subdirectory (e.g.
blog,wp). No dots or special characters.
Step 2: Site Configuration
- Site Title (required)
- Site Description
- Allow search engines to index this site — toggle
Step 3: Admin Account
- Admin Username (required)
- Admin Email (required)
- Admin Password (required) — use the Show password button to verify
Step 4: Advanced Options
- Enable Debug Mode — turns on WordPress
WP_DEBUG - Clean existing files before installation — wipes target directory first (use with care)
- WordPress Language — choose installation language
- Timezone — site timezone
Step 5: Review & Install
Summary of all settings. Confirm to start the asynchronous installer with progress tracking and conflict handling.
TIP
The installer runs in the background. You can navigate away and the installation will continue. Track progress under Manage WordPress.
Installation Wizard Steps
- Domain & Path – Choose where to install WordPress.
- Site Configuration – Configure your WordPress site settings.
- Admin Account – Create your WordPress administrator account.
- Advanced Options – Configure advanced WordPress settings.
- Review & Install – Review your settings and start installation.